Introduction: The
Death knight is Blizzard's first hero class in World of Warcraft and
all Horde Death Knights have their own starting zone called Ebon Hold,
which is a small area east of Eastern Plaguelands, and the levels are
from 55 - 58. In order to create a Death Knight, you must have at least
a level 55 (of another type of class and faction) on the specific
server you are playing on, this will unlock your ability to create a
Death Knight on that server. Death knights start at level 55 and
you must have at least a level 55 on your account in order to even
create a Death knight. Both the Alliance and Horde Death knights start
in the same zone except they level independently from each other. In
other words, the Alliance cannot see the Horde and Vice Versa (much
like they are in their own Instance). Once Death knights get past the
starting zone of Ebon Hold, you have the option of going straight to
Outland or doing quests in the Plaguelands. From my experience,
it is much more efficient to do the quests in the Western Plaguelands
before going into Outland, which is what my guide will cover.
Something
you should know before we continue on, there will be a lot of optional
cloth turn in quests you can do in all major cities, along with other
"Turn In" quests, which can dramatically level your DK really quick,
thus getting you to Northrend MUCH faster. With your other
characters on the server you are playing on, it would be best to your
advantage to obtain the following items and then mail them to your
Death Knight. You can obtain them in the AH quickly.
Although if you did not pre farm them, and can't obtain them in the AH,
you will then have to skip the cloth turn ins, and the other turn in
quests as well. Here is a list of items you can send to your
Death Knight to powerlevel him:
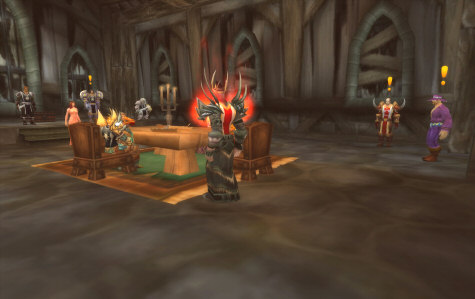
Death
knights generally start by creating their rune weapon (through a small
series of quests), and then start questing in Ebon Hold. This starting
zone helps you to get familiar with on how to play your Death knight.
You will get your epic mount from a quest pretty soon as well.
The starting zone is relatively brief and you will be questing in
Western Plaguelands, and then Outland in no time. So lets begin..
LEGAL:
Do not distribute this product in any way shape or form. Any
theft or unauthorized reproduction of this Guide is prohibited.
Violators will be prosecuted. Special markers have been encrypted
into this guide to identify the original buyer. Be WARNED if you
distribute this guide on the internet, I will know who it is.
PLEASE READ! (HOW TO USE THIS GUIDE):
08)"Quest Name" (this quest has a yellow highlighted number) Quests
that have a yellow highlighted number simply means it is numbered on
the map to the right. This saves time because some quests are not
numbered on the maps, so you know whether or not to look on the maps.
All
quests and mobs through out my guide are linked to wowhead. When
following my guide, you can use these links for further information on
the quests/mobs.
All video links are in RED.
You will need to download the Divx WebPlayer when prompted. And
you can double click on the videos when playing to make it full screen.
The checkboxes ()
next to each step are for your personal use only. I have included
them for each step incase you want to mark off which step in the guide
you are at. You do not have to use these if you don't want, I
have included them since it was requested by a lot of people.
Guide Color Codes: Accept a quest. Go do a quest. Turn in a quest. General mob/item link. Picture. Video link.
Interactive MAP MOD (MetaMap) Coordinates.
Go here to learn how to get map coordinates and Interactive Map Coordinates, which are very important to have when using my guide.
Help me improve this guide!
If
you feel that some quests should contain additional information that
would be helpful, or if you have any additions or find any errors in
this guide, PLEASE contact me here, make sure you leave "Deathknight Guide Improvements" in the subject line so it filters correctly into my inbox. I appreciate any feedback to make this guide better!
World of Warcraft™ World
of Warcraft and Blizzard Entertainment are trademarks or registered
trademarks of Blizzard Entertainment, Inc. in the U.S. and/or other
countries.
If you are interested in making money referring people to buy my guide, you can follow the instructions on THIS PAGE HERE
about how to do this, generally with my affiliate program you earn 50%
of all the profit if you refer somebody to my site with your affiliate
link that buys my guide! TALK ABOUT EASY MONEY!
05) "The Endless Hunger"
This is done in the arena pit in the middle of the room, right-click on
the skulls that is holding one of the Unworthy Initiate's chains, then
kill him. (See Video). Once done, turn it in ... Accept "The Eye Of Acherus"
07) "Death Comes From On High"
Simply control the Eye to visit the 4 locations in Ebon Hold then use
the 'Siphon of Acherus' ability at each location. TIP: Look
for the small red arrows that are at the 4 buildings you need to
visit. Also if you go on top of the roofs for these places you
will avoid being hit by the mobs. See Video. Once done turn it in (at the Lich King) ... Accept "The Might Of The Scourge"
05) "Into the Realm of Shadows" Kill a Dark Rider of Acherus
(around 52.47) and take his Deathcharger (horse) back to Death's Breach
(use the button on the action bar to return it). Once done turn
it in.
06) Please note: Turning in "Into the Realm of Shadows" enables you to summon a Deathcharger. In order to do so, you have to access your "Pets" menu to use the icon/ability.
07) Go to the mailbox by the house at 55.46 and right-click the scroll on top of the mail box, accept/complete "Abandoned Mail".
Please note, this is the only mailbox in Ebon Hold, so if you want to
transfer anything from another character to your Death knight, this is
the only mailbox to do so for now. There is another one you can
use later at Light's Hope Chapel in Eastern Plaguelands.
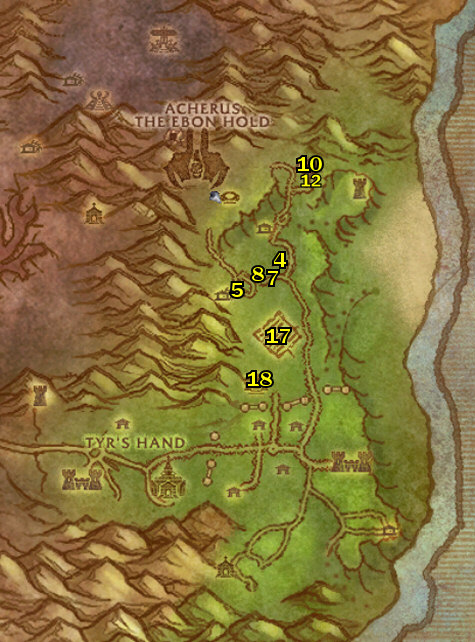
12) "Massacre At Light's Point"
You need to get into an Inconspicuous Mine Car (at 58.33) then fire the
cannons to kill 100 Scarlet Defenders. TIP: to aim the cannon
around hold down the right mouse button. Use the 'Skeletal Gryphon Escape' button on the Cannon to return back to Death's Breach. Once done, turn it in ... Accept "Victory At Death's Breach!"
05) "Noth's Special Brew" (simply right-click the cauldron in front of you). Please note, you can keep turning in 20 Skulls for the Noth's Special Brew, which is a very nice potion!
07) "How To Win Friends And Influence Enemies" Right click the Ornately Jeweled Box
and equip the two swords. Then go kill mobs in New Avalon (you need to
attack fighters not citizens). Please note this quest may take a
while before one of the mobs gives up the information, so it may take
awhile. Once this is done, go back to the Crypt and turn it in
... Accept "Behind Scarlet Lines"
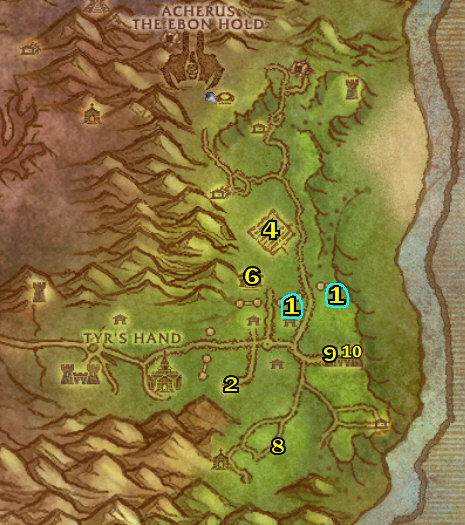
11) "Bloody Breakout"
Simply wait there under the shield (this is important as you will take
a LOT less damage from the enemies) and kill the mobs that come to you,
eventually the High Inquisitor will show up last, kill him, then loot
his remains. NOTE: Anyone can loot the corpse of the
Inquisitor, even people outside of your party. This quest is not
easy to solo, so be prepared to drink some health potions during this.
01) Once they are both done, go back to the Tavern (56.79) and turn them in ... Accept "A Cry For Vengeance!"
03) "A Special Surprise" The prison house is right in front of you (at 54.83). Simply walk up to Antoine Brack
(he is a male undead), wait for the dialog to go by, then kill him to
complete the quest. Once done, turn it in ... Accept "A Sort Of Homecoming"
14) Once done, fly back to the Lich king at Death's Breach (53.36) then use the 'Leave Vehicle' button to dismount, and turn in "An End To All Things..." ... Accept "The Lich King's Command"
15) "The Lich King's Command"
Need to go to Light's Hope Chapel in Eastern Plaguelands, go through
the cave at 49.28, then turn this in at 34.31 ... Accept "The Light of Dawn" (please note that if there is a battle going on the quest giver will not be there, so you may have to wait).
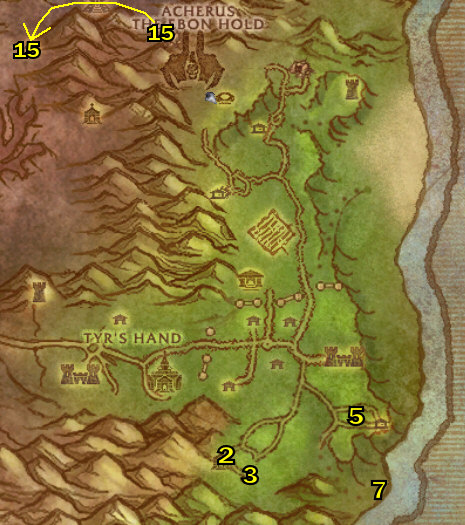
Becoming the Horde
01) "The Light of Dawn"
This is relatively easy, it just takes awhile, a new battle for this
quest begins every 15 minutes or so. So you may have to wait awhile
until the next one starts for you to do it. This is the last quest for
the Death Knight chain, and is a big part of the storyline. You
will not die during this quest, you actually don't even have to do
anything, you can just wait until it is over and the quest will finally
complete itself. See Video during the combat part of this quest.
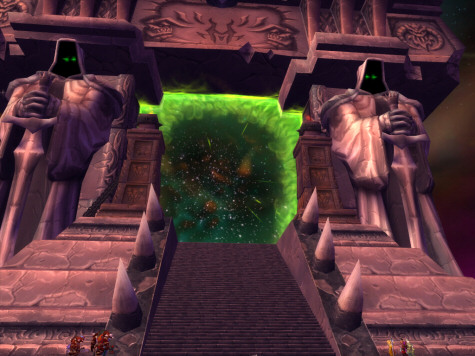
03) "Taking Back Acherus" Use your new Death Gate spell to go back to The Ebon Hold. Death Gate, which you just learned is an unholy spell in your spell book that allows you to go back to Ebon Hold from now on.
05) "The Battle For The Ebon Hold" Go through the pink portal, then kill ten scourge and Patchwerk (the big abomination). Just like the previous quest, you will not die and have super damage and health again.
07) "Warchief's Blessing"
South-east (from where you are at), go through the portal to
Orgrimmar. Then run all the way to Thrall (31.37 in Orgrimmar) to
turn this quest in.
08) You are now a member of the horde (and not the scourge any longer), how does it feel?
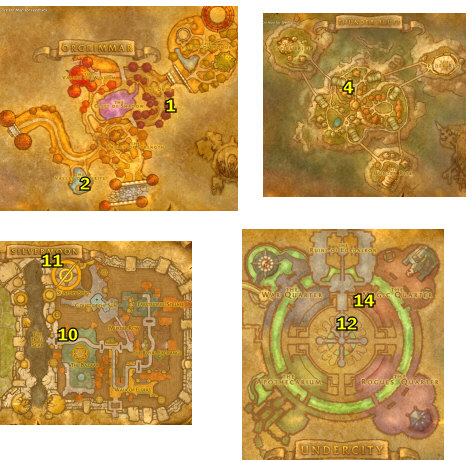
Cloth Turn In Quests
01)
While you are in Orgrimmar you have the option to turn in any cloth you
have for the cloth 'Turn In' quests here. However if you do not
have cloth to turn in, you can skip to STEP #5 below. You can
transfer the cloths from your other characters on the server you are in
through the mail system. The following cloth turn-ins are done at
(63.50 the Drag in Orgrimmar). You can turn in 60 Wool for "A Donation of Wool", 60 Silk for a "A Donation of Silk", 60 Mageweave for "A Donation of Mageweave", and 60 Runecloth for "A Donation of Runecloth"
02) Next go to the Valley of Spirits (at Vehena, 37.87) you have the option once again to turn in yet more cloth quests: 60 Wool for "A Donation of Wool", 60 Silk for a "A Donation of Silk", 60 Mageweave for "A Donation of Mageweave", and 60 Runecloth for "A Donation of Runecloth"
03)
Now if you still have more cloth to turn in, then please do the
following step: (However if you do not, you can skip to STEP #5 below)
04) Fly to Thunder Bluff, and go to (43.42, at Rumstag Proudstrider) and you can turn in 60 Wool for "A Donation of Wool", 60 Silk for a "A Donation of Silk", 60 Mageweave for "A Donation of Mageweave", and 60 Runecloth for "A Donation of Runecloth"
05) Death Gate back to Ebon Hold.
06) Get new spells/abilities while you are there. Also make sure your new weapon you have has a Runeforge Enchant on it.
07) Go to the first floor of Ebon Hold base, and get the Flight Path (from Grimwing, he is on the south-east side of the base).
08)
Now if you have even more cloth to turn in, then please go to the next
step. (However if you do not, then fly to the Undercity and skip to
STEP #12 below.)
09) Fly to Silvermoon City (The Blood Elf major city), which is in the north-east corner of the Eastern Kingdoms.
10) Go to Sorim Lightsong (at 56.52 in Silvermoon City) and you can turn in 60 Wool for "A Donation of Wool", 60 Silk for a "A Donation of Silk", 60 Mageweave for "A Donation of Mageweave", and 60 Runecloth for "A Donation of Runecloth"
11) Next go to the Undercity (by using the Orb teleporter at 49.14 in Silvermood City)
12) Once at the Undercity make it your new home to get your HearthStone (Inn Keeper is at 67.38).
13)
Now if you have even more cloth to turn in, then please go to the next
step. (However if you do not, you can skip to STEP #15 below)
14) Go to the Magic Quarter, and go to Ralston Farnsley (at 71.28), and you have the option once again to turn in the following cloth quests: "A Donation of Wool", 60 Silk for a "A Donation of Silk", 60 Mageweave for "A Donation of Mageweave", and 60 Runecloth for "A Donation of Runecloth"
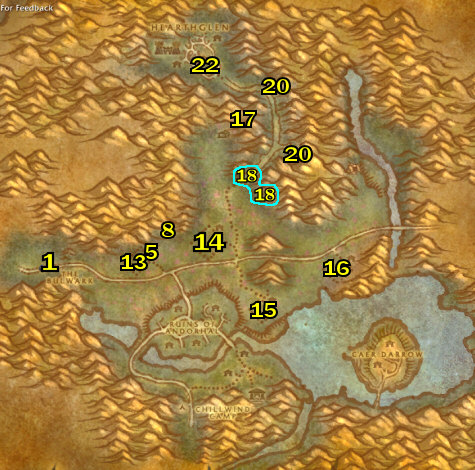
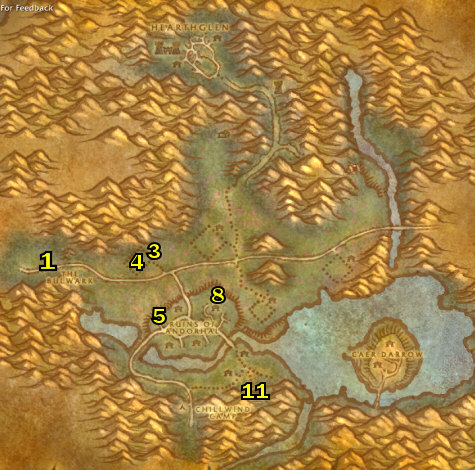
01) Go over to the the Bulwark... (which is a small village east of Tirisfal Glades that borders Western Plaguelands).
02)Turn in "A Call To Arms: The Plaguelands!" accept "Scarlet Diversions"
NOTE: Make sure you get a Flame in a Bottle for this quest, it's
in the box right next to the NPC where you accepted the quest.
03)Accept and complete "Argent Dawn Commission" NOTE: As far as speed leveling is concerned, it is NOT necessary to equip the given Argent Dawn Commission, just keep your current trinkets on.
12)Go
complete the whole Cauldron quest chain, you need to kill the Cauldron
Lord at each targeted field (listed below), grab their key and use it
at the big cauldron in the middle of the field. (Just keep going
back and forth from The Bulwark to the next field completing each one,
turning them in and then accepting and doing the next one)...
14)"Target: Dalson's Tears" (46.52). NOTE: While you are here, there is a small quest chain here that starts with a little Diary in the barn (47.50) called "Mrs. Dalson's Diary", just click that to complete the quest. Now, after you did that, then you need to kill a Wandering Skeleton to get a key that opens the outhouse behind the barn. After you get the key and open the outhouse, it will release a Farmer Dalson,
a level 56 undead. Kill him, grab that key, and then run in the
house (that is right next to the barn) and go up the stairs, there you
will find a cabinet, open the cabinet with that key (For the quest "Locked Away") and finally it's over. Easy 10200 XP! Or was it?
04)Do "Two Halves Become One" (Jabbering ghouls
out in Felstone Field drop the item you need, once you get the item
right-click it in your inventory), then go back to the lady in the
house to turn it in.
05)Go south into the Ruins of Andorhal, go up in the Inn (at 39.66) and accept "A Matter of Time" (from Chromie)
16)At this point you should for sure be friendly with the Argent Dawn.
17) We are now done with questing in the PLs!
18) Death Gate to Ebon Hold.
19)
Fly to Light’s Hope Chapel (in Eastern Plaguelands). ALTHOUGH
PLEASE NOTE: If you do not have any of the following items (found
in the next section), then skip the next section, and go to the
'Journey to Outland' section below!
Light's Hope Chapel (EPs)
01)
Once at Light's Hope Chapel, go to the mailbox there and get the
following items out of your mailbox (if you have them) for the
following possible 'Turn In' quests:
06)
At 50.14 (right when you enter the Blasted Lands) there is a small
quest hub with 5 quests available, you can turn in all of those 'beast
parts' for those quests there for a total of 6,750 XP (considering if
you have ALL the parts listed above).
11) Go to the Cenarion Expedition in Zangermarsh and turn in any Unidentified Plant Parts for the quest "Plants of Zangarmarsh" and then "Identify Plant Parts" (at Lauranna Thar'well).
The reason we are doing this in advance is the DeathKnight is reliant
on attack power. You will be able to buy the head enchant from here to
use until you can replace it in Northrend. You will hand in plant parts
until Honored then you can head back to Thrallamar to start the
Hellfire Quest lines. The reason we did this first thing is there are
quests in Hellfire that give reputation towards Cenarion. Since
we have already done all the hand-ins to get to honored then every
quest you do while progressing to 70 for them will put you closer and
closer to Revered. By just doing the quests for them in the
various zones you will be revered and never have to do an
instance. Hence it helps your overall character and helps you
level faster.
12)
Now to continue on, you can use my current Outland Guide to level up
through Outland all the way until 68, or level 70 if you wish. If
you enter Northrend at level 68, then you will most likely need to do
both starting zones in Northrend (Borean Tundra and Howling
Fjord). I will list more possible quick 'Turn In' quests you can
do in Outland to quickly get some free XP, here is the list:
LOCATION: Sporegar - Zangarmarsh Total Yields 75400 - Requires 62
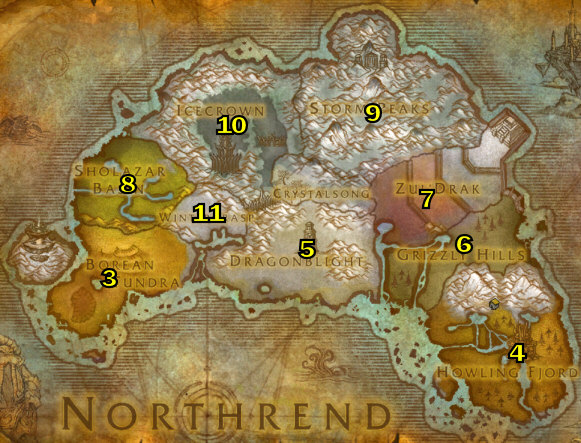
To continue on with this guide, please go to my Outland Guide!
Joana's Death Knight Strategy Guide
Death Knight - Introduction
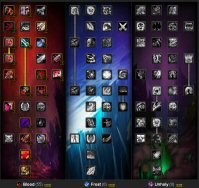
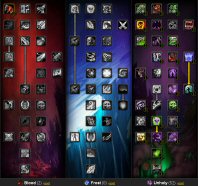
Death Knight's Rune System
The
death knight uses a unique rune-based resource system to govern his
spells and abilities. There are three rune types: blood, frost, and
unholy, each with an attached color and symbol (listed directly under
your character portrait). As you use these abilities, the runes will
become exhausted. After a period of time (10 seconds) the runes will
refresh. The Death Knight will be able to use spells to turn a rune
into a Death Rune, which can be used as a Blood/Frost/Unholy rune. In
addition, whenever the Death Knight uses a rune ability against a foe,
it will build up a certain amount of Runic Power (the light-blue bar
where mana or energy would be for other classes). This Runic Power is
only used by few abilities. Certain abilities (such as Dancing Rune
Blade) will completely drain all the Runic Power that has been
accumulated. The more power stored, the more effective the ability.
Most abilities that use Runic Power use a set amount, like Death Coil.
Death
knights will not be able to reallocate the number and type of runes -
they're fixed to 2 runes of each type. Runeforging will still be
available, but it will only provide permanent weapon enchants. The
enchants work just like the permanent weapon enchants provided by
Enchanting, but are self-only and are supposed to be better for the
death knight than the Enchanting ones.
Here are the possible Enchants you will have to work with:
Affixes your rune weapon with a rune that has a chance to increase your
Frost and Shadow spell damage by 10% for 15 sec. Modifying your rune
weapon requires a Rune Forge in Ebon Hold. 5 sec cast
Affixes
your rune weapon with a rune that causes 2% extra weapon damage as
Frost damage and has a chance to increase Frost vulnerability.
Modifying your rune weapon requires a Rune Forge in Ebon Hold.
Affixes your two-handed rune weapon with a rune that deflects 5% of all
spell damage. Modifying your rune weapon requires a Rune Forge in Ebon
Hold. 5 sec cast
Affixes
your two-handed rune weapon with a rune that deflects 4% of all spell
damage and reduces the duration of Silence effects by 50%.
Modifying your rune weapon requires a Rune Forge in Ebon Hold.
Affixes your rune weapon with a rune that has a chance to strike undead
for extra Fire damage and stun them for 5 sec. Modifying your rune
weapon requires a Rune Forge in Ebon Hold. 5 sec cast
Affixes your two-handed rune weapon with a rune that increases Parry
chance by 3%. Modifying your rune weapon requires a Rune Forge in Ebon
Hold. 5 sec cast
Affixes
your two-handed rune weapon with a rune that increases Parry chance by
4% and reduces the duration of Disarm effects by 50%. Modifying
your rune weapon requires a Rune Forge in Ebon Hold.
Affixes
your rune weapon with a rune that has a chance to heal you for 3% and
increase total Strength by 30% for 15 sec. Modifying your rune
weapon requires a Rune Forge in Ebon Hold.
Death Knight's Runeforging
Death
Knights have a unique enchant-like system called Runeforging. Death
Knights will learn Runeforging right from their first couple of quests
in the starting area of Ebon Hold. Runeforging is just like enchanting
(but only for Death Knights). When near a Runeforge you will be able to
click a spell in your spell book, just like enchanting, and then choose
an "enchant" to perform on the weapon. Runeforging will overwrites
previous enchants.
Currently there are 8 different 'enchants' you can place on your weapon.
* Rune of Cinderglacier:
Affixes your rune weapon with a rune that has a chance to increase the
damage by 20% for your next 2 attacks that deal Frost or Shadow damage.
* Rune of Lichbane: Affixes your rune weapon with a rune that adds 2% extra weapon damage as Fire damage or 4% versus Undead targets.
* Rune of Razorice:
Affixes your rune weapon with a rune that adds 2% extra weapon damage
as Frost damage and has a chance to increase Frost vulnerability.
* Rune of Spellbreaking: Affixes your rune weapon with a rune that deflects 2% of all spell damage and reduces the duration of Silence effects by 50%.
* Rune of Spellshattering: Affixes your rune weapon with a rune that deflects 4% of all spell damage and reduces the duration of Silence effects by 50%.
* Rune of Swordbreaking: Affixes your rune weapon with a rune that increases Parry chance by 2% and reduces the duration of Disarm effects by 50%.
* Rune of Swordshattering: Affixes your rune weapon with a rune that increases Parry chance by 4% and reduces the duration of Disarm effects by 50%.
* Rune of the Fallen Crusader: Affixes your rune weapon with a rune that has a chance to heal you for 3% and increase total strength by 30% for 15 sec.
Death Knight's Presences
You will come across 3 types of presences that Death Knight's have, here is a quick rundown of each:
* Blood Presence increases damage output by a percentage and restores a percentage of damage dealt as health.
* Frost Presence increases threat and lowers damage taken by a percentage.
* Unholy Presence increases attack speed and reduces the global cooldown on death knight abilities.
Talents
Here is a quick rundown of the Death Knight's talents:
* Blood: Talents in this tree focus on weapons, armor, healing, and strikes.
* Frost: Talents in this tree focus on armor, control, counters, and combos.
* Unholy: Talents in this tree focus on spells, summons, diseases, and AOE.
Good Talent Specs
What
is the fastest leveling spec you may ask? Well I have tried many
combinations and done lots of research into this, and overall no matter
which one you choose (either unholy spec, blood spec, or frost) you
really can't go wrong as they can all be efficient when leveling fast.
Blood
spec allows for reduced downtime, more uptime, more killing = faster
XP! (this follows as long as it isn't too gimp over the other specs,
which it is not). I also noticed soloing Elites was much easier
going Blood Spec.
From my experience
Unholy works the best for me overall when it comes to fast leveling,
but it requires a little more attention on your part. In which you got
to try and kill multiple mobs at once continuously (hence the AoE
abilities of the Unholy talents and abilities).
However,
Unholy spec (as noted above), can work better for AOE grinding (that is
killing multiple mobs at once). Your XP per hour can be better if you
manage to gather 2 mobs to kill at a time. However when questing, a lot
of the time you are only facing one mob at a time, in which case a good
Blood spec is your better option. Unholy is slower than Blood when
facing one mob at a time.
Here are other specs that can be used for a variety of purposes:
Death Knight Tanks
Death knights are a very unique class in which they can be used as very effective tanks as well!
Death
Knight's tank by chaining cooldowns together, they don't have anywhere
near the level of passive or rotational defense as the other tanks.
This
causes them to have excellent defenses in PvP without the requirement
of giving up offense. However, as they're more of an outlast class, as
they're a pure (or, as pure as Priest, Warrior, etc) without any
traditional PvP boons like Drains, Healing Debuffs or Crowd Control.
With
your early starting DK's your usual combat sequence usually looks
something like this: Raise Dead (if you do not have a ghoul),
Death Grip (if your target is further away), Icy Touch, Plague Strike,
Blood Strike, Blood Strike, Pestilence, (Oblit / Heart Strike), Death
Coil.
TIP:
You are better off spamming your abilities than not using abilities at
all, as this continuously raises your runic power, which allows you to
use abilities such as Death Coil.
For
a Blood Death Knight, a rather effective combo for fighting and putting
use to your Blood Strike is the current order of spells:
• Plague Strike • Blood Strike • Death Strike
When
doing this order, give the Plague Strike's disease at least 10 seconds
before you use a Death Strike. When you use Death Strike it will heal
you for the damage the disease did.
Also, another useful thing
about this combination is the Death Trance talent, allowing you to cast
a free / guaranteed crit Death Coil.
Check out This Video for simple gameplay elements.
Dual Wield or Two-Handed weapons?
Dual
Wield can't really compete competitively with 2h in tier 7, but it is
possible it'll catch up in the future. It's impossible to say for sure,
but dual wield white damage scales faster than 2h white damage, but you
do lose damage on weapon based abilities, so it is possible it'll never
even out. Even if it does, it'll be a very specialized build to make
dual wield competitive, you won't have the versatility that 2h gets
where every tree is viable to spec into.
DW seems to be more of
an extra they gave us rather than something the class is designed
around. There's even been blue posts suggesting that if DW is clearly
better than 2h that it'll likely be changed in some way, although I'm
guessing if they turn out about equal they'd be fine with it.
They
have said that they test at a variety of gear ranges and not just what
is going to be available right away, so I think it is likely DW will
catch up to 2h for DPS, otherwise I don't see why they'd make it a
class ability if it is always intended to be worse.
Some useful UI Mods for the Death Knight:
RuneWatch
- RuneWatch is a RuneFrame Replacement Addon which has slowly evolved
into a UnitFrame for DeathKnights. The Mod tracks your runes, thier
cooldowns and also visually represents your Runic Power.
The
aim of RuneWatch is to make your DeathKnight specific statistics more
visually appealing and noticeable. In addition to this, RuneWatch is
highly customizable and allows you to change a number of aspects of
both it's Appearance and Behavior.
RuneMover
- This mod allows you to move your run bar around and allows you to
enlarge it. so get this if you would rather have a better visual
for your run bar.
DoT Timer
- You can get this if you would like to have a nice visual on screen
for when your cooldowns for your abilities are ready to use
again. Although I personally just like to use CoolDownCount.
AutoProfit
- This mod allows you to sell all your gray items you have to a vender
at once, this saves time, I definitely recommend getting it no matter
what class you are!
More coming soon!
I have complied you a very good list of external links that can help you out a lot with the Death Knight!
55: When starting a Death Knight (at level 55) you have the following abilities to work with:
Death Grip -
I like to think of this skill as the Mortal Kombat's "Get Over Here!"
spell! This is a taunt ability that grabs mobs from a distance
and then forces that mob to attack you for 3 seconds. It has a 35
second cooldown, so you can't use it too often. There are some
talents that can bring this cooldown further.
Icy Touch -
This is an instant cast ice spell, Chills the target for 127 to 137
Frost damage and infects them with Frost Fever, a disease that reduces
melee and ranged attack speed by 14% for 12 sec. This is an
instant cast ability that requires 1 frost rune.
Plague Strike -
A vicious strike that deals 30% weapon damage plus 37.5 and infects the
target with Blood Plague, a disease dealing Shadow damage over time.
The strike removes one heal over time effect from the target.
This is an Instant cast and requires 1Unholy rune. This is an
important DK ability, since it puts up a disease for your Blood Strikes
to do more damage.
Blood Strike - Instantly strike the enemy, causing 50% weapon damage plus 191, and an additional 95.5 bonus damage per disease.
Death Coil -
Fire a blast of unholy energy, causing 167 Shadow damage to an enemy
target or healing 250.5 damage from a friendly Undead target.
This is an instant cast spell that requires 40 runic power. You
can use this ability on your enemies to damage them, or use it on
friendly undead units to heal them. Remember you can use this
ability to heal your ghouls, or other friendly Death Knights!
Blood Presence - This
is the first presence you start off with, since this is the only one
you start off with, you cannot switch over to other ones until you get
the frost and unholy presence. This presence strengthens the
Death Knight with the presence of blood, increasing damage by 15% and
healing the Death Knight by 2% of damage dealt. Only damage dealt to
targets that grant experience or honor can trigger this heal. Only one
Presence may be active at a time.
56: Once you turn level 56, you can get the following new abilities:
Raise Dead -
Raises a Ghoul to fight by your side. If no humanoid corpse that yields
experience or honor is available, you must supply Corpse Dust to
complete the spell. If the corpses of friendly players are raised, they
will have control over the Ghoul. You can have a maximum of one Ghoul
at a time. Lasts 2 min. The ghoul acts like a normal pet and it
has a decent duration (2 minutes) if not Unholy, and it lasts until it
dies if you are Unholy. That said, it's really not that cumbersome to
try to find a corpse. If all else fails, corpse dust is super cheap.
Death Strike - (Requires Melee Weapon)
A deadly attack that deals 60% weapon damage plus 67.2 and heals the
Death Knight for a percent of damage done for each of <his/her>
diseases on the target. This is one of the Death Knight's most
famous abilities, I love it :)
Pestilence -
Causes 27 to 33 Shadow damage to the target and all targets within 10
yards and spreads any diseases on the target to the additional
targets. TIP: Using this spell along with the Blood Boil ability provides a great AoE tank synergy.
57: Once you turn level 57, you can get the following new abilities:
Frost Presence -
(one of the 3 presences) The death knight takes on the presence of
frost, increasing total health by 10%, armor contribution from items by
60%, and reducing spell damage taken by 5%. Increases threat generated.
Only one Presence may be active at a time.
Mind Freeze -
Smash the target's mind with cold, interrupting spellcasting and
preventing any spell in that school from being cast for 4 sec.
This is an instant cast that requires 10 runic power. This
ability works in much the same way as pummel and kick. The major difference however is that this is considered frost and therefore will ignore physical immunities such as Hand of Protection.
58: Once you turn level 58, you can get the following new abilities:
Blood Boil - Causes
any of the Death Knight's diseases on the target, and all enemies
within 30 yards of the target, to painfully erupt, dealing 59 to 71
Shadow damage. This spell is meant to be used in conjunction with
the Pestilence ability. What I do is I would mount up and run
through 3 melee mobs, Icy Touch a further 4th melee mob, and then Death
Grip a 5th mob to me. Once I've Death Grip'd the 5th mob I turn back to
the 4th mob that already has Frost Fever on him and I Plague Strike
him. Now he has 2 diseases and so I Pestilence to spread the diseases
and drop Death and Decay. Now I decide whether heals are important
(usually that aren't needed) and either Blood Boil immediately or wait
until after I Death Strike. You can usually finish the rest off with
auto attacks at that point or get another Death Strike or two in before
the mobs are all gone so you can be close to full HP if not maxed and
be ready to start the next pull.
In instance AoE tanking, can rinse and repeat the Icy Touch=>Plague Strike=>Petilence=>Blood Boil as needed to help keep aggro off healers on the nonskull marked target.
Chains of Ice -
Instant attack that requires 1 frost rune. Shackles the target
with frozen chains, reducing their movement to zero. The target regains
10% of their movement each second for 10 sec. This is a great PvP
spell.
59: Once you turn level 59, you can get the following new ability:
Strangulate -
Instant cast that requires one blood rune. Strangulates an enemy,
silencing them for 5 sec, and deals 80 Shadow damage at the end of the
effect. This is similar to Mind Freeze except this is a
straight-up silence for 5 seconds, requires a Blood rune instead of
Runic Power, and has a 30 yard range. Mind Freeze uses Runic
Power, is melee range only, and is an interrupt, not a 'silence', per
say. In PvP this is great for silencing healers from a distance.
60: Once you turn level 60, you can get the following new ability:
Death and Decay -
Instant cast that requires 1 blood rune, 1 unholy rune, and 1 frost
rune. Corrupts the ground targeted by the Death Knight, causing
26 Shadow damage every sec that targets remain in the area for 10 sec.
This ability produces a high amount of threat. I consider this
ability more of an aggro spell than a damage doer. You can
combine this ability with the +40% threat from the Frost Presence and
you have a very useful tool for AoE tanking as a Death Knight.
61: Once you turn level 61, you can get the following new abilities:
Obliterate -
Instant cast, requires 1 unholy and 1 frost rune. A brutal
instant attack that deals 100% weapon damage plus 124, and an
additional 62 bonus damage per disease, but consumes the
diseases. NOTE: Death Knight abilities that deal "x damage
per disease" only take into account the diseases applied by the death
knight using the ability. Diseases from other sources including mobs,
consumables, priests and other death knights are NOT factored into the
multiplier. NOTE: Death
Knight abilities that deal "x damage per disease" only take into
account the diseases applied by the death knight using the ability.
Diseases from other sources including mobs, consumables, priests and
other death knights are NOT factored into the multiplier. At the
time of this writing all DKs can apply two diseases (Frost Fever and Blood Plague). Deep Unholy DKs can apply a third disease in the form of Crypt Fever.
Path of Frost -
Instant cast requires 1 frost rune. The Death Knight's freezing
aura creates ice beneath <his/her> feet, allowing <him/her>
and <his/her> party or raid to walk on water for 10 min. Works
while mounted. Any damage will cancel the effect. This skill is
both very fun and very useful. In Borean Tundra especially, there are
Tuskaar and pirate quests that take place near and over water. You can
traverse the water easily, and get there quicker than any other class
by far.
62: Once you turn level 62, you can get the following new ability:
Icebound Fortitude -
Instant cast, 1 min. cooldown, requires 20 runic power. The Death
Knight freezes <his/her> blood to become immune to Stun effects
and reduce all damage taken by 50% for 12 sec. Does not remove existing
Stun effects.
64: Once you turn level 64, you can get the following new ability:
Blood Tap -
Instant cast, 1 min. cooldown, requires 6% of your base health.
Immediately activates a Blood Rune and temporarily converts it into a
Death Rune. This rune counts as a Blood, Unholy, or Frost Rune. Lasts
20 sec. Keep in mind it not only converts a blood rune into a
death rune, but it also activates one.
65: Once you turn level 65, you can get the following new ability:
Dark Command -
20 yd range, instant cast, 8 sec cooldown. Commands the target to
attack you, but has no effect if the target is already attacking you.
66: Once you turn level 66, you can get the following new ability:
Death Pact -
Instant cast, 2 min. cooldown, requires 40 runic power.
Sacrifices an undead minion, healing the Death Knight for 20% of
<his/her> maximum health. This is a useful ability, and
note that it can work on Gargoyles too.
67: Once you turn level 67, you can get the following new ability:
Rune Strike -
Requires Melee Weapon and 20 runic power. Strike the target for
200% weapon damage plus [200 * AP * 10 / 10000]. Only usable after an
attack is dodged or parried. Can't be dodged, blocked, or parried.
68: Once you turn level 68, you can get the following new ability:
Anti-Magic Shell -
Instant cast, 1 min. cooldown, requires 20 runic power. Surrounds
the Death Knight in an Anti-Magic Shell, absorbing 75% of the damage
dealt by harmful spells and preventing application of harmful magical
effects. Damage absorbed by Anti-Magic Shell energizes the Death Knight
with additional runic power. Lasts 5 sec. Keep in mind this only
blocks magic, it does not block curses, poisons and diseases. And
it doesn't remove current magical debuffs, it just prevents new ones
from occurring for the duration of the shield.
69: Once you turn level 69, you can get the following new ability:
Eye of Acherus -
Instant cast, requires 1 frost rune, 10 second cooldown. Summons
the Eye of Acherus with 100 health 5 min that allows vision of nearby
area and warns of enemies that attack it. Right-Click on buff to switch
back and forth between Eye of Acherus and normal vision. I've
personally never been able to figure out how to get this ability, I'm
not sure where you can learn this from, anyone know?
70: Once you turn level 70, you can get the following new ability:
Unholy Presence -
Instant cast, 1 second cooldown, requires 1 unholy rune. Infuses
the death knight with unholy fury, increasing attack speed by 15%,
movement speed by 15% and reducing the global cooldown on all abilities
by 0.5 sec. Only one Presence may be active at a time. As a speed
runner I am always for faster movement speed, so I was very happy to
see this implemented for the DK. This is also very useful for
PvP, since you attack faster (more burst), less GCD (so you can use
your abilities quickly) and some amount of run speed (so you don't get
kited as much).
75: Once you turn level 75, you can get the following new ability:
Empower Rune Weapon -
Instant cast, 5 min. cooldown. Empower your rune weapon,
immediately activating all your runes and generating 25 runic
power. What this does is it totally replenishes all your runes
back and gives you 25 runic power, but you can only use it every 5
minutes. This is very useful, remember to use this once your
runes have been nearly all exhausted to get them back!
80: Once you turn level 80, you can get the following new ability:
Army of the Dead -
Requires 1 blood, unholy, and frost rune. This is a channeled
ability that has a 20 minute cooldown. Summons an entire legion
of Ghouls to fight for the Death Knight. The Ghouls will swarm the
area, taunting and fighting anything they can. While channelling Army
of the Dead, the Death Knight takes less damage equal to
<his/her> Dodge plus Parry chance. I haven't really found
too many uses for this ability. It doesn't work too good for PvP
since it can be easily interrupted. Not that great for soloing mobs
either. The best use is really crowd control during dungeon
fights with a group.
Other skills you can get:
Here are the other skills you can obtain from either doing quest or from talents:
Corpse Explosion -
Instant cast, Cause a corpse to explode for Shadow damage modified by
attack power to all enemies within 10 yards. Will use a nearby corpse
if none is targeted. Does not affect mechanical or elemental
corpses. This spell is just like the necromancer corpse explsion
skill from Diablo2, it can be a very effecitve AoE ability.
On a Pale Horse -
Instant cast, You become as hard to stop as death itself. The duration
of all Stun and Fear effects used against you is reduced by 10%, and
your mounted speed is increased by 10%. This does not stack with other
movement speed increasing effects. Can be a good to get for PvP.
Unholy Blight - Instant cast, A
vile swarm of unholy insects surrounds the Death Knight for a 10 yard
radius. Enemies caught in the area take 21 Shadow damage per sec.
Lasts 20 sec. When leveling, you don't use Unholy
Blight that often, because you fight a lot of single targets, Unholy
Blight still is very useful for AoE'ing though.
While
playing a DK, you may come across someone using abbreviations for their
abilities/spells. Here is a list of those abbreviations so you
know what they stand for. You should memorize these as it might
come in handy:
PS = Plauge Strike SS = Scourge Strike DnD = Death and Decay BB = Blood Boil DG = Death Grip CE = Corpse Explosion FF = Frost Fever BP = Blood Plauge DS = Death Strike DC = Death Coil BP = Blood Presence IT = Icy Touch OB = Obliterate BT = Blood Tap SG = Strangulate DP = Death Pact Pest = Pestilence CoI = Chains of Ice BS = Blood Strike HS = Heart Strike RS = Rune Strike AMS = Anti-Magic Shell UB = Unholy Blight HoW = Horn of Winter HB = Howling Blast AotD = Army of the Dead AMZ = Anti Magic Zone
Useful Macros: (After
you play the Death Knight for awhile and get used to their
spells/abilities, you can then refer to this advance macro section for
using macros to make your life easier).
The
following is a very useful macro for healing your ghoul, it quickly
targets your ghoul, throws a death coil at him, then quickly switches
back to your previous target. This is great for someone using an Unholy
Spec.
If you do not have a pet, this will raise the dead.
If you are in melee range you will use Dark Command, however if you are not in range, you will cast Death Grip.
This macro will cast Hysteria on: 1. Yourself if you aren't in a group 2. Yourself if you are pressing alt 3. Your target's target if they are an enemy 4. Attempt to cast it normally
PVP
Macro: This is a good PVP macro that when you see your ghoul take a lot
of damage and he could die, quickly use this macro to cause your ghoul
to explode with the Corpse Explosion ability to cause a quick "nuke".
This can also be used in PVE.
More coming later!
You
can check the bottom of my 1-60 guide for general tips/tricks on how to
level faster, along with hunter specific tips/tricks.
COMING SOON: Recorded 1-80 speed runs!
Want to leave testimonials about my guide? You can do that on my MySpace Page through leaving a comment!
For screenshots and to get to know Joana/Mancow better you can visit this part of my site here! And if you are interested in signing up for my newsletter, you can do so at this page here!
Help me improve this guide!
If
you feel that some quests should contain additional information that
would be helpful, or if you have any additions or find any errors in
this guide, PLEASE contact me here, make sure you leave "Deathknight Guide Improvements" in the subject line so it filters correctly into my inbox. I appreciate any feedback to make this guide better!
MORE GUIDES: To check out more World of Warcraft guides that are decent buys, you can check out Ultimate World Of Warcraft Guide for WotLK PvP strategies and tips and they also offer lots of guides for free lifetime membership updates, Luke's Gold Guide, which is great if you need a gold guide, and also the Penn's Profession's Guide for in-depth overview of WoW professions, this guide can give you some more pointers on the classes and such. And for a complete list of WoW products you can purchase, please check out my Premium Guide List out.


 Death Grip -
I like to think of this skill as the Mortal Kombat's "Get Over Here!"
spell! This is a taunt ability that grabs mobs from a distance
and then forces that mob to attack you for 3 seconds. It has a 35
second cooldown, so you can't use it too often. There are some
talents that can bring this cooldown further.
Death Grip -
I like to think of this skill as the Mortal Kombat's "Get Over Here!"
spell! This is a taunt ability that grabs mobs from a distance
and then forces that mob to attack you for 3 seconds. It has a 35
second cooldown, so you can't use it too often. There are some
talents that can bring this cooldown further. Death Coil -
Fire a blast of unholy energy, causing 167 Shadow damage to an enemy
target or healing 250.5 damage from a friendly Undead target.
This is an instant cast spell that requires 40 runic power. You
can use this ability on your enemies to damage them, or use it on
friendly undead units to heal them. Remember you can use this
ability to heal your ghouls, or other friendly Death Knights!
Death Coil -
Fire a blast of unholy energy, causing 167 Shadow damage to an enemy
target or healing 250.5 damage from a friendly Undead target.
This is an instant cast spell that requires 40 runic power. You
can use this ability on your enemies to damage them, or use it on
friendly undead units to heal them. Remember you can use this
ability to heal your ghouls, or other friendly Death Knights! Raise Dead -
Raises a Ghoul to fight by your side. If no humanoid corpse that yields
experience or honor is available, you must supply Corpse Dust to
complete the spell. If the corpses of friendly players are raised, they
will have control over the Ghoul. You can have a maximum of one Ghoul
at a time. Lasts 2 min. The ghoul acts like a normal pet and it
has a decent duration (2 minutes) if not Unholy, and it lasts until it
dies if you are Unholy. That said, it's really not that cumbersome to
try to find a corpse. If all else fails, corpse dust is super cheap.
Raise Dead -
Raises a Ghoul to fight by your side. If no humanoid corpse that yields
experience or honor is available, you must supply Corpse Dust to
complete the spell. If the corpses of friendly players are raised, they
will have control over the Ghoul. You can have a maximum of one Ghoul
at a time. Lasts 2 min. The ghoul acts like a normal pet and it
has a decent duration (2 minutes) if not Unholy, and it lasts until it
dies if you are Unholy. That said, it's really not that cumbersome to
try to find a corpse. If all else fails, corpse dust is super cheap. Frost Presence -
(one of the 3 presences) The death knight takes on the presence of
frost, increasing total health by 10%, armor contribution from items by
60%, and reducing spell damage taken by 5%. Increases threat generated.
Only one Presence may be active at a time.
Frost Presence -
(one of the 3 presences) The death knight takes on the presence of
frost, increasing total health by 10%, armor contribution from items by
60%, and reducing spell damage taken by 5%. Increases threat generated.
Only one Presence may be active at a time. Chains of Ice -
Instant attack that requires 1 frost rune. Shackles the target
with frozen chains, reducing their movement to zero. The target regains
10% of their movement each second for 10 sec. This is a great PvP
spell.
Chains of Ice -
Instant attack that requires 1 frost rune. Shackles the target
with frozen chains, reducing their movement to zero. The target regains
10% of their movement each second for 10 sec. This is a great PvP
spell.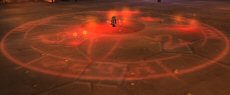 Death and Decay -
Instant cast that requires 1 blood rune, 1 unholy rune, and 1 frost
rune. Corrupts the ground targeted by the Death Knight, causing
26 Shadow damage every sec that targets remain in the area for 10 sec.
This ability produces a high amount of threat. I consider this
ability more of an aggro spell than a damage doer. You can
combine this ability with the +40% threat from the Frost Presence and
you have a very useful tool for AoE tanking as a Death Knight.
Death and Decay -
Instant cast that requires 1 blood rune, 1 unholy rune, and 1 frost
rune. Corrupts the ground targeted by the Death Knight, causing
26 Shadow damage every sec that targets remain in the area for 10 sec.
This ability produces a high amount of threat. I consider this
ability more of an aggro spell than a damage doer. You can
combine this ability with the +40% threat from the Frost Presence and
you have a very useful tool for AoE tanking as a Death Knight. Path of Frost -
Instant cast requires 1 frost rune. The Death Knight's freezing
aura creates ice beneath <his/her> feet, allowing <him/her>
and <his/her> party or raid to walk on water for 10 min. Works
while mounted. Any damage will cancel the effect. This skill is
both very fun and very useful. In Borean Tundra especially, there are
Tuskaar and pirate quests that take place near and over water. You can
traverse the water easily, and get there quicker than any other class
by far.
Path of Frost -
Instant cast requires 1 frost rune. The Death Knight's freezing
aura creates ice beneath <his/her> feet, allowing <him/her>
and <his/her> party or raid to walk on water for 10 min. Works
while mounted. Any damage will cancel the effect. This skill is
both very fun and very useful. In Borean Tundra especially, there are
Tuskaar and pirate quests that take place near and over water. You can
traverse the water easily, and get there quicker than any other class
by far. Anti-Magic Shell -
Instant cast, 1 min. cooldown, requires 20 runic power. Surrounds
the Death Knight in an Anti-Magic Shell, absorbing 75% of the damage
dealt by harmful spells and preventing application of harmful magical
effects. Damage absorbed by Anti-Magic Shell energizes the Death Knight
with additional runic power. Lasts 5 sec. Keep in mind this only
blocks magic, it does not block curses, poisons and diseases. And
it doesn't remove current magical debuffs, it just prevents new ones
from occurring for the duration of the shield.
Anti-Magic Shell -
Instant cast, 1 min. cooldown, requires 20 runic power. Surrounds
the Death Knight in an Anti-Magic Shell, absorbing 75% of the damage
dealt by harmful spells and preventing application of harmful magical
effects. Damage absorbed by Anti-Magic Shell energizes the Death Knight
with additional runic power. Lasts 5 sec. Keep in mind this only
blocks magic, it does not block curses, poisons and diseases. And
it doesn't remove current magical debuffs, it just prevents new ones
from occurring for the duration of the shield.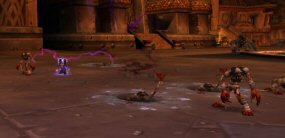 Army of the Dead -
Requires 1 blood, unholy, and frost rune. This is a channeled
ability that has a 20 minute cooldown. Summons an entire legion
of Ghouls to fight for the Death Knight. The Ghouls will swarm the
area, taunting and fighting anything they can. While channelling Army
of the Dead, the Death Knight takes less damage equal to
<his/her> Dodge plus Parry chance. I haven't really found
too many uses for this ability. It doesn't work too good for PvP
since it can be easily interrupted. Not that great for soloing mobs
either. The best use is really crowd control during dungeon
fights with a group.
Army of the Dead -
Requires 1 blood, unholy, and frost rune. This is a channeled
ability that has a 20 minute cooldown. Summons an entire legion
of Ghouls to fight for the Death Knight. The Ghouls will swarm the
area, taunting and fighting anything they can. While channelling Army
of the Dead, the Death Knight takes less damage equal to
<his/her> Dodge plus Parry chance. I haven't really found
too many uses for this ability. It doesn't work too good for PvP
since it can be easily interrupted. Not that great for soloing mobs
either. The best use is really crowd control during dungeon
fights with a group. Corpse Explosion -
Instant cast, Cause a corpse to explode for Shadow damage modified by
attack power to all enemies within 10 yards. Will use a nearby corpse
if none is targeted. Does not affect mechanical or elemental
corpses. This spell is just like the necromancer corpse explsion
skill from Diablo2, it can be a very effecitve AoE ability.
Corpse Explosion -
Instant cast, Cause a corpse to explode for Shadow damage modified by
attack power to all enemies within 10 yards. Will use a nearby corpse
if none is targeted. Does not affect mechanical or elemental
corpses. This spell is just like the necromancer corpse explsion
skill from Diablo2, it can be a very effecitve AoE ability.